BS Input
Documentation version 2.0.1
Introduction
- Item Name : BS Input
- Item Version : v 2.3.3
- Author : BeSquares
First of all, Thank you so much for purchasing this plugin and for being my loyal customer.
You are awesome!
You are entitled to get free lifetime updates to this product + exceptional support from the author directly.
Requirements
You will need the following sofwares use the plugin.
- WordPress
- Web Browser for testing (eg: Google Chrome or Mozilla Firefox)
Uploading & Installing #back to top
To install a plugin you generally just need to put the plugin file into your 'wp-content/plugins' directory. Once a plugin is installed, you may activate it or deactivate it from the Plugins menu in your WP administration
You can also upload the plugin from WordPress dashboard go to Plugins > Add New then select Upload plugin and choose bsinput.zip file from the downloaded package
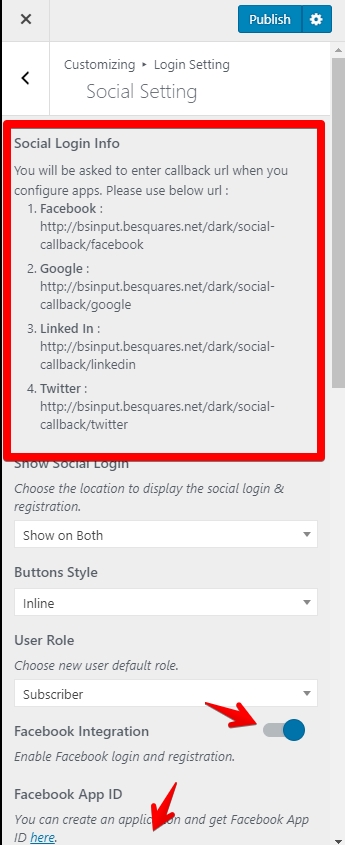
Configure Social Account #back to top
To configure your soical accounts go to Themes > Customize > Login Settings > Social Settings With each soical option you will find inline documentation on how to configure it
Configure Google Login #back to top
To enable Google login/register you need Google Client ID and Google Client Secret
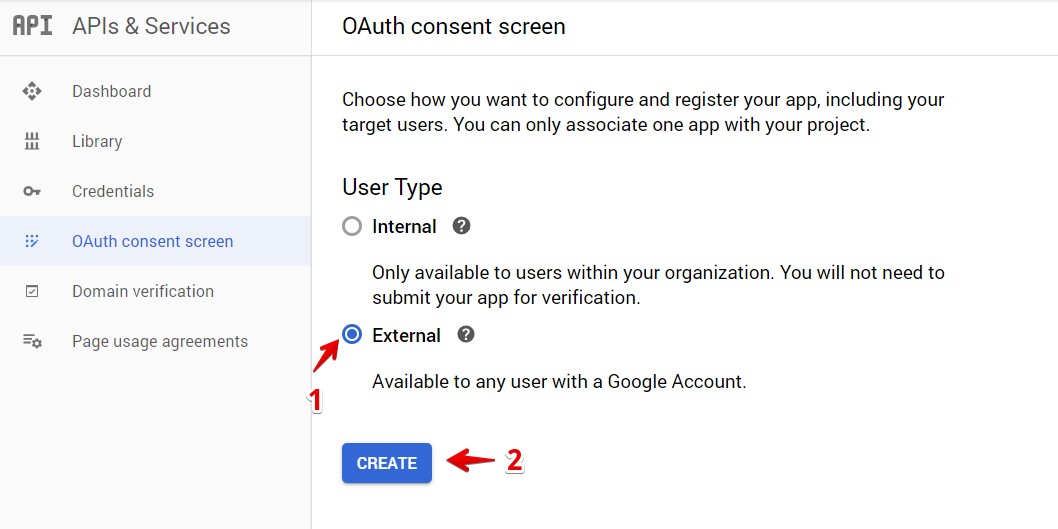
To get your credentials go to Google API Console then start new project or use existing one
From the left sidebar select OAuth consent screen
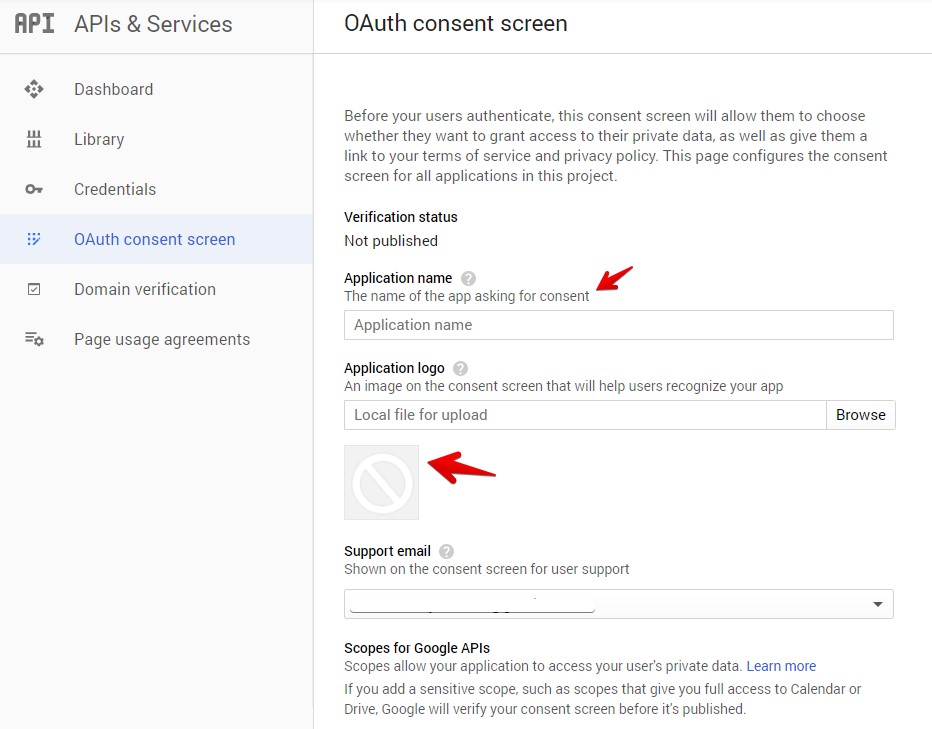
Add Application name, your website logo and scroll down then type your website url in the Authorized domains field without https or http then hit the save button
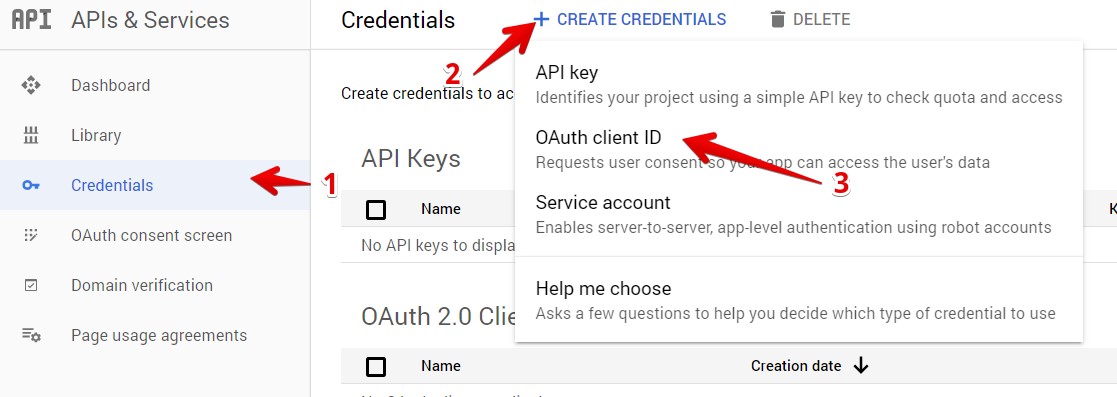
Once you save select Credentials from the left sidebar and create new OAuth client ID as the following
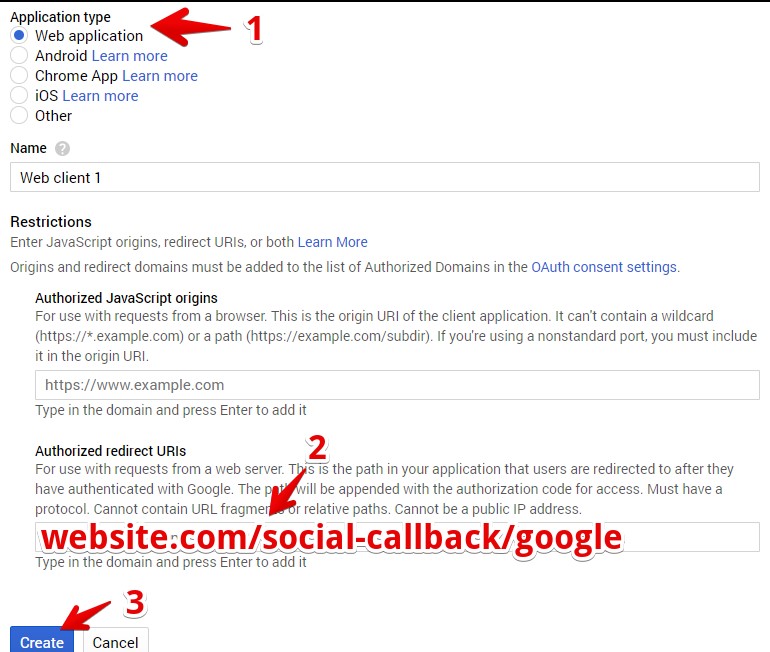
Select Web appilication and add the Authorized redirect URIs as the following
Copy both Client ID and Client Secret save them for later usage at your website settings section for BS Input
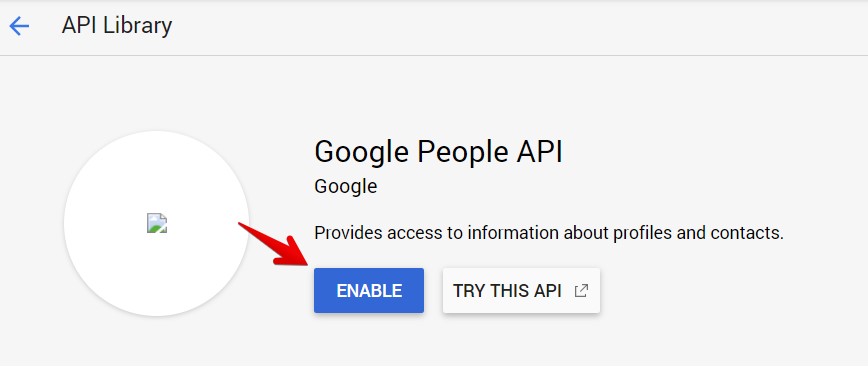
Go to Library from the left sidebar then search for Google People API and enable it
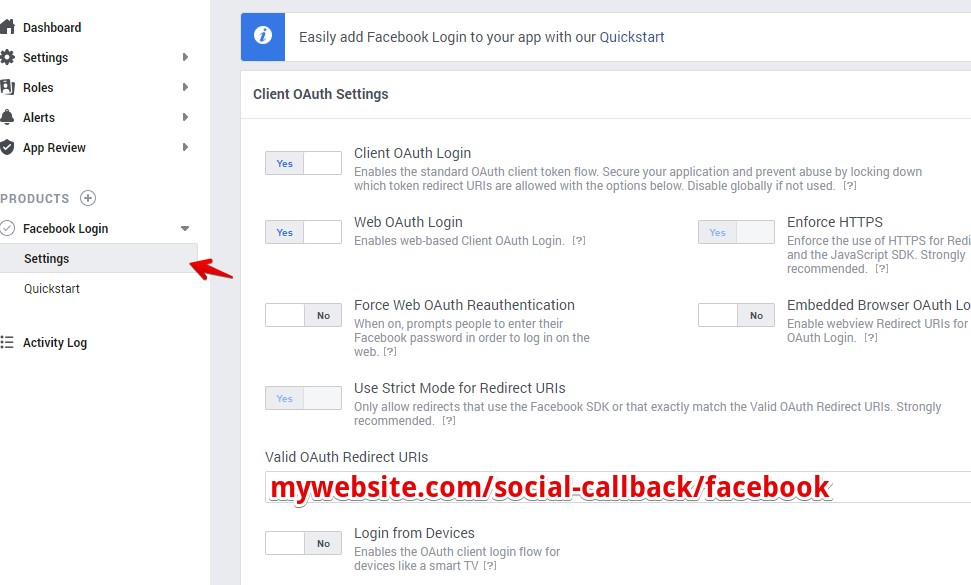
Configure Facebook Login #back to top
First thing you need to create Facebook APP to do that go to Facebook Developers then click on Add a New App
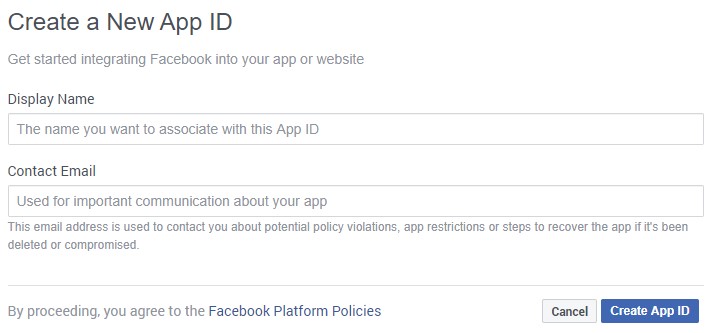
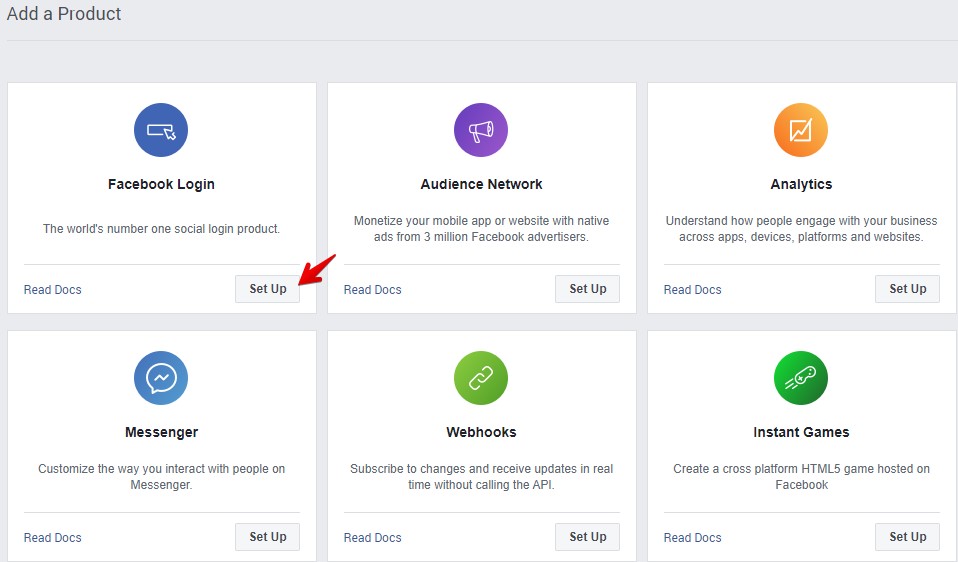
After adding your app name and email address click on Create App ID and select Facebook Login
Go to Settings From the left sidebar
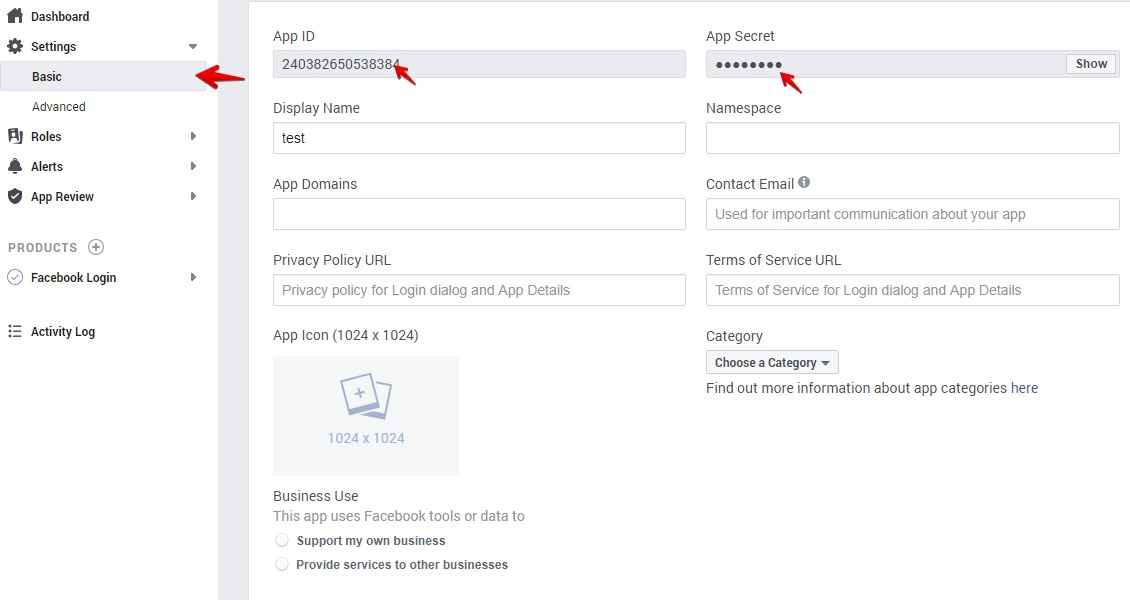
To get your app Credentials go to your app basic settings as the following screen
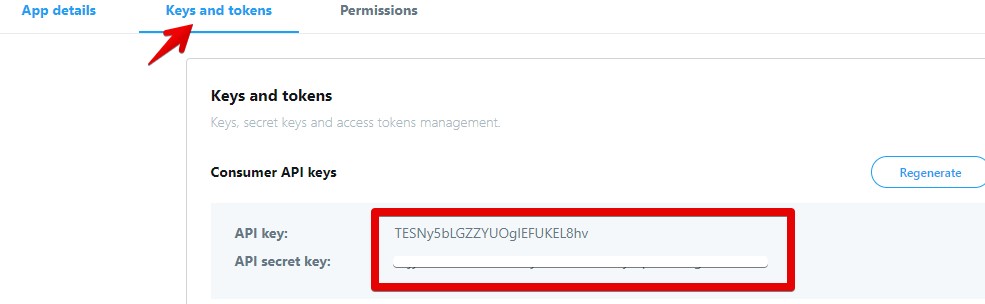
Configure Twitter Login #back to top
To create Twitter app go to Twitter developers then click on Create an app
After you submit your app for review go to your app settings to get both the API and Secret
Configure Linkedin Login #back to top
To create Linkedin app go to Linkedin Developers then click on Create APP

- App Name: Specify the name of your app (You can enter whatever name you like, but it’s recommended to enter your website or company name in this field)
- Company: Specify the name of your company
- Privacy Policy URL: Optionally, you can save privacy policy url of your website here
- Business Email: Specify email address
- App Logo: Logo of your company/website
- I have read and agree……: Check the checkbox
- Click Create App button
Ignore the notification to verify your company page and Navigate to Auth section
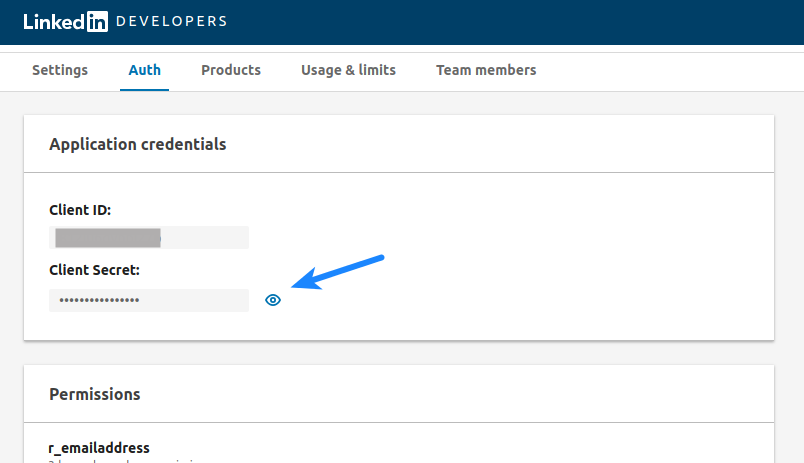
Copy both Client ID and Client Secret then add them to our plugin social settings
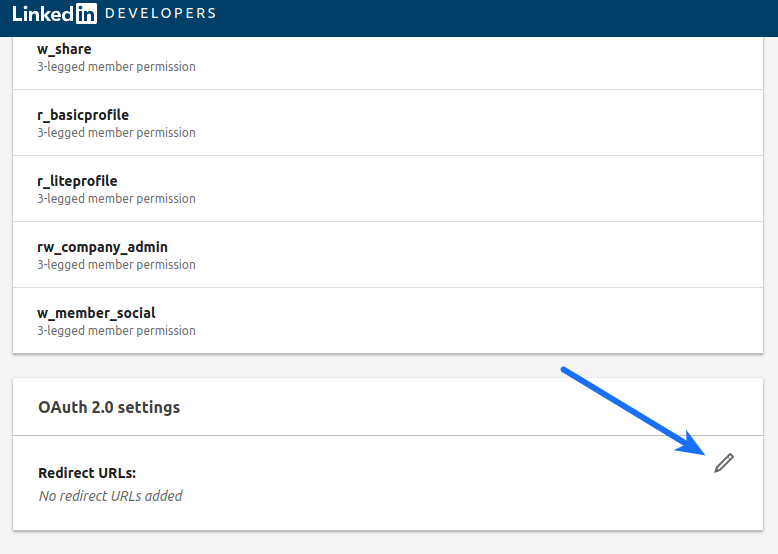
Add new redirect url as the following format mywebsite.com/social-callback/linkedin
User Profile Picture #back to top
You need to install the following plugin WP User Avatar Since WordPress doesn not allow upload or change user avatars
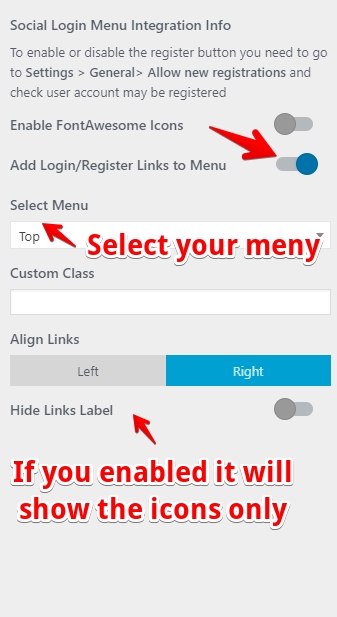
Add Login/Register Buttons To Main Menu #back to top
Make sure first to create site menu then go to Themes > Customize > Login Settings > Menu Integration
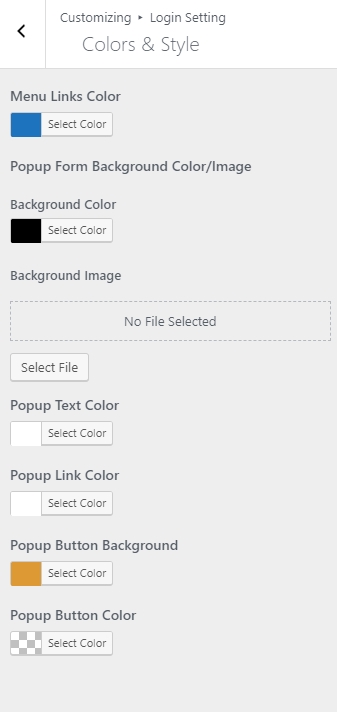
Popup Color & Style #back to top
Configure Google ReCAPTCHA #back to top
You need first to generate site key and secret to enable Google ReCAPTCHA to that Click here
Once you add your site url go to your WordPress dashboard > Customizer > Login Settings > General Settings then enable ReCAPTCHA and add both your key and secret
Shortcode #back to top
You can place the following shortcode anywhere in your site and it will show the login/register form
[bs_popup_login]
To show some content for logged in users only use the following shortcode
[bs_input_restrict]YOUR_CONTENT[/bs_input_restrict]
To show the login buttons only
[bs_input_buttons]